Introduction
The Area screen shows the different regions of the municipality that have been set up for the Locations/Walking report. This page discusses the form used to manipulate the Areas data as well as the buttons for controlling
the form.
The Form
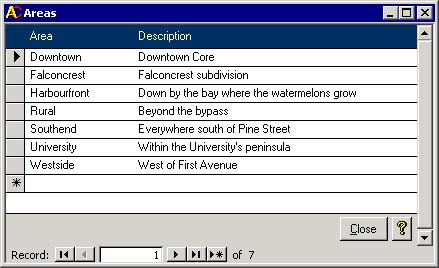 The Animal Control Officer sometimes must go door-to-door in order to make sure all dogs, and cats if
necessary, have tags. This Areas form, as shown in the picture on the right, is where you can split your municipality up into walking routes. Subdivision names and school names are often used for Area names;
however, you are not restricted to these. If the subdivision is too large, then it could be split into smaller areas; on the other hand,
it could be combined with others if it is too small. The idea is to have enough animals on the route to fill either half a day, or a full day of going door-to-door. All animals that
have ever been registered, and have no deceased date will be printed using the Location report for a chosen area. Setting up the areas using this screen is just the first step.
The second step is to assign street names to the areas. The Animal Control Officer sometimes must go door-to-door in order to make sure all dogs, and cats if
necessary, have tags. This Areas form, as shown in the picture on the right, is where you can split your municipality up into walking routes. Subdivision names and school names are often used for Area names;
however, you are not restricted to these. If the subdivision is too large, then it could be split into smaller areas; on the other hand,
it could be combined with others if it is too small. The idea is to have enough animals on the route to fill either half a day, or a full day of going door-to-door. All animals that
have ever been registered, and have no deceased date will be printed using the Location report for a chosen area. Setting up the areas using this screen is just the first step.
The second step is to assign street names to the areas.
The Buttons
There are only three things to mention for this section of such a small form. The Close button will close the form. The button with the yellow question mark will bring up this
help page. Finally, there are record selectors along the bottom left of the screen which help you to jump to the beginning, end, a new record, or anywhere in between.
|