|
|
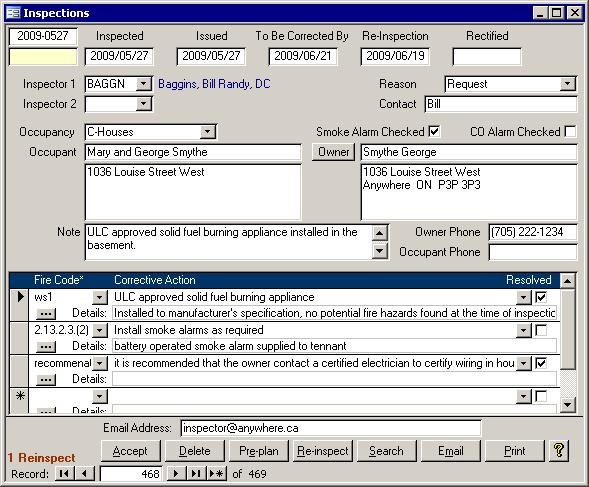
IntroductionThis should be a short topic, right? Well, not really. There are a lot of features packed into this one form. From lookup forms to detail forms, Inspections has it all. In itself, the Inspections form is two
forms in one. The top part of the form, which contains the main inspection information, and the bottom part that contains one or more records of the particulars of the inspection. There are also several buttons for
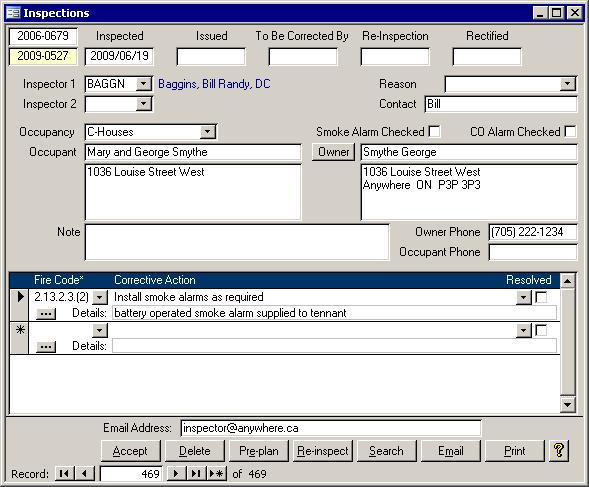
accessing the various features. This help page will describe all of this from the top down. Main Inspection InformationThe top section of the inspections form, pictured below, contains data about each inspection like when and where the inspection took place.
There are many boxes, but several are self explanatory. Some are required while others only need data some of the time. Most fields appear on the Ministry's Fire Safety Inspection Report.
ParticularsThe list of the particulars has only four fields, so they are all explained below.
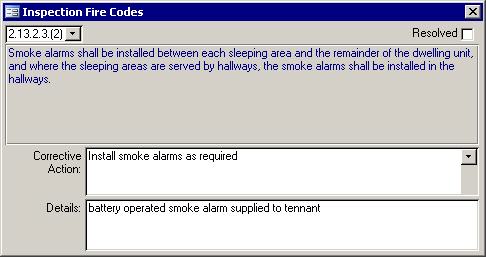
Note that the Fire Code column label has an asterisk. This means that double clicking on the Fire Code field will do something. Actually, it will pull up the form below which lets you see the entire record in full.
ButtonsThere are a plethora of buttons. Some pull up other forms with their own buttons that need to be described. Owner
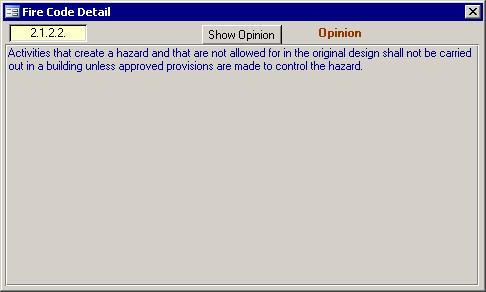
EllipsesIn the Particulars section, there is a button with an ellipses ("...") for every record. Clicking this button will launch the Fire Code Lookup form similar to the one below.
Designed to allow you to quickly find the fire code you need, you can either look through the list, use the Find (Ctrl+F) tool, or use the filters at the bottom to limit your choices. If you know at least some of the parts of the fire code number, you can start by entering them in their respective part number boxes. Clicking the Apply button will show only the fire codes that have the designated parts. Another way of filtering is by looking for a word or phrase in the Contravention field. To do so, type the word or words into the Contravention filter box near the bottom and click Apply. It is not perfect since it can only search the first 1275 characters of the contravention, but currently only two use more than 1275 characters, so the likelihood of finding a match is high. Because many contraventions are longer than 255 characters, it may be necessary to click the Full Text button to read the entire contravention to ensure the correct one is selected. A screen similar to the one below will appear.
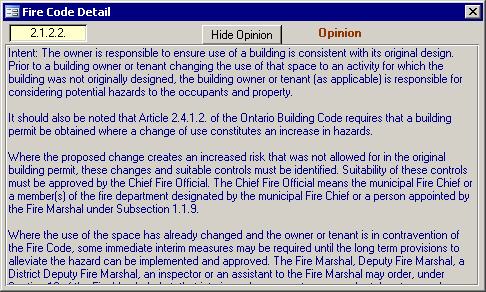
If the selected fire code has an opinion on its interpretation, you will see the word Opinion and the Show/Hide Opinion button will be visible. When that button says Show Opinion, the blue text in the box will be the contravention; otherwise, the opinion will be visible instead. If the box is too small to see all the words, click in the box and use the page up/down or cursor keys to navigate through the text. The screen shot below shows an opinion.
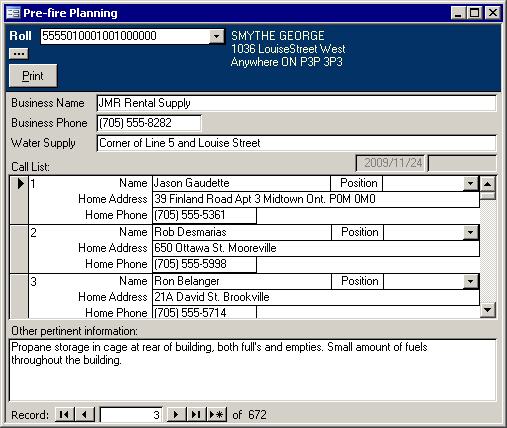
AcceptThe Accept button will save the inspection as is and send you to a new record. DeleteClicking this button will first double check you want it deleted then will delete the current inspection. Pre-planAfter having performed an inspection, and a roll has been selected, a pre-plan can be entered. Below is a screen showing a pre-plan that has been entered.
A pre-plan, which gets filled out before an incident happens, groups needed information about a property that is important to fire fighting efforts. Included are contact names an numbers of key holders as well as what kind of flammable or explosive material is on site and where it is stored. There is an ellipses button near the roll; click it when the wrong roll is showing. The same search screen as was used to find the property will be used. Changing the roll on this screen will not change the roll back on the Inspections screen. Re-inspectOnce a property has been inspected again, if there are still some outstanding violations, do the following:
A new inspection will be created based on the original. Using the picture at the top of this section as an example, below is a picture showing how the new inspection would look.
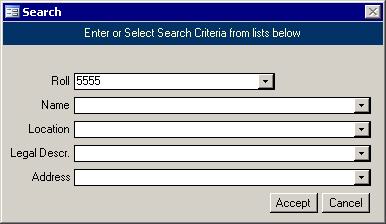
A new inspection file number will be created, the original will appear in the yellow box beneath the new file number, and the Re-inspected date will copied to the Inspected field. The Inspector personnel codes, Occupancy Type, Contact, Occupant, and Owner information will be copied directly from the original. As well, the unresolved violations, that is those whose Resolved check box were left blank, will be copied to the new inspection. Finally, the new inspection will appear on the screen, so you will not have to search for it. SearchClicking the Search button will launch a search screen that is similar to the one used by the Owner button, but there are more fields. You can search for inspections using the File Number, Inspected date, Re-inspection file number, Re-inspect date, Inspector, Contact or Occupancy type. The inspection report can be emailed to the address in the box just above the buttons. Click the Email button to send a snapshot of the report. The recipient must have access to a snapshot viewer to be able to view the report. The viewer can be downloaded from Microsoft.com. If you would prefer the report in pdf format, then that is possible too. This button will show you an inspection report that has a similar layout as the hand written form put out by the Ministry. Only the currently selected incident will appear. Use the Incident report found under the Reports menu to print this report for all incidents.
|
 In the middle of the Inspections screen is a button. Having selected the inspector and the occupancy
type, click the owner button. The screen on the right will appear. Once you have selected the property, the owner name and address as well as the roll and occupant address will be filled in for you
. If they are not in the lists, then you will have to enter all of this data manually.
In the middle of the Inspections screen is a button. Having selected the inspector and the occupancy
type, click the owner button. The screen on the right will appear. Once you have selected the property, the owner name and address as well as the roll and occupant address will be filled in for you
. If they are not in the lists, then you will have to enter all of this data manually.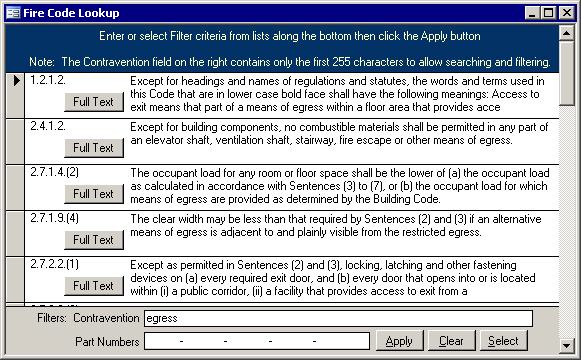
| [Personnel] [Sessions] [Vehicles] [SCL] [Incidents] [Equipment] [Inspections] |