Introduction The Plot Master keeps track of all plots. Each plot must have a
plot code. There are several tabs, as shown in the picture below, that allow you to access the various aspects of each plot.
This page will explain each of the tabs before describing the functions of the buttons and other controls that are on the form.
The Tabs There are 5 tabs on this form. Each tab will have its fields and any buttons described
before the main Plot Master form's buttons. You can find those detailed near the bottom of this page.Master Tab As shown in the picture above there are many fields on the Master tab. The top section has to do with the rights holder.
- Plot Code:
In the above picture the C-B1-024- -26 number is the plot number. It is made up of the
cemetery code, the section code, and the row, lot and grave numbers. These codes appear in full in the top blue section of the Plot Master.
Rights Holder: These two boxes hold the surname and given names of the person who holds the Interment Rights to this plot.
Address: The Right Holder's address at the time of purchase or of last update includes several boxes. The street address is the large box. Under that are boxes
for the city, province, postal code and a three digit country code.
City Type and District: These fields are used on the Deed.
Size: The size of the plot is important. If it has not been entered, then the plot will not be available in the Re-interment list.
Purchased: This shows the date the interment rights were purchased by the Rights Holder.
Purchase Price: This was the going rate as of the Purchased date.
Perpetual Care: At the time of purchase, these funds are collected and saved. Interest earned off the Perpetual Care figure is used to pay for the upkeep of the grave yard.
Telephone: While historical records rarely have a record of the Right Holder's phone number, it is sometimes useful when trying to contact a Right Holder when
verifying whether or not a plot has been abandoned.
The bottom section, that is, all the fields below the etched line hold data on the person interred in that plot. Most of these fields are useful for genealogy purposes.
- Deceased:
These two boxes hold the surname and given names of the person who has been interred into this plot. The asterisk indicates that double clicking on
the Surname field will cause the computer to take some action. In this case, double clicking in the Surname field will copy the surname and given names from
the Rights Holder name fields. This is useful to make sure there are no typing mistakes.
- Maiden/Nee:
If the person changed their name for marriage, then put the maiden name in these boxes.
- Nickname:
Useful for genealogists, this makes it easier to compare historical records from other sources.
- Place of Death:
This appears on the
Contract for Purchase of Interment Rights.
- Gender:
This appears on several plot reports and is needed by genealogy.
- Next of Kin:
These two boxes hold the surname and given names of the person who is the next of kin to the deceased. Next of kin is the term used to describe a
person's closest living blood relative or relatives.
- Relationship:
Enter in the relationship of the Next of Kin to the deceased. Common entries include mother, father, daughter, son, sister, or brother, but wife,
husband, aunt, uncle, or cousin are sometimes used.
- Dates:
The Dates box is used to store the birth, deceased, interment, and, where appropriate, cremated dates.
- Funeral Home:
This appears on various plot reports.
- Container:
This is probably only useful for disinterments. That way the digger knows to look for an urn or a casket. Of course, the plot size is often another indicator.
The Master tab does indeed contain a lot of fields. They are the most used, so they are on the first screen. The other tabs are not quite as full. Maintenance Tab 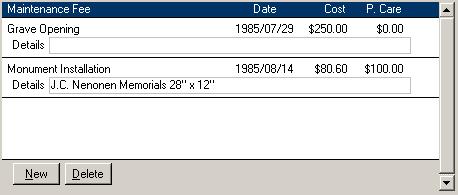 As shown in the picture on the right, you can add new maintenance records on this tab. Usually, this screen is used for viewing,
adding or editing historical data while the Cash Receipts system is used to add new records that will affect this year's General Ledger. Along the bottom are two buttons. The New button will add a
blank record so you can add the new information. The Delete button will remove a record. As shown in the picture on the right, you can add new maintenance records on this tab. Usually, this screen is used for viewing,
adding or editing historical data while the Cash Receipts system is used to add new records that will affect this year's General Ledger. Along the bottom are two buttons. The New button will add a
blank record so you can add the new information. The Delete button will remove a record.
Transfers Tab  The picture on the left shows the Transfers tab's contents. This shows who had purchased then sold the interment rights for the chosen plot.
This is just a simple list with some of the key information about the transfer. Notice how the The picture on the left shows the Transfers tab's contents. This shows who had purchased then sold the interment rights for the chosen plot.
This is just a simple list with some of the key information about the transfer. Notice how the 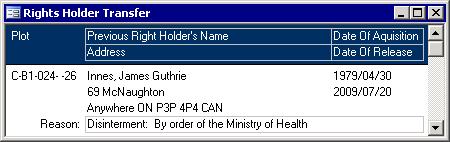 Previous Right Holder's Name label ends with an asterisk. If you double click on the
name of a previous right holder the screen on the right will appear. This second screen contains all of the information about the transfer including the reason. Previous Right Holder's Name label ends with an asterisk. If you double click on the
name of a previous right holder the screen on the right will appear. This second screen contains all of the information about the transfer including the reason.
Disinterments Tab
Like the previous tab, this one shows a list of critical information. As in the picture below, this tab contains more fields. 
Also like the Transfers tab, this tab has a field whose label has an asterisk. Double clicking on the Date will bring up that disinterment record as in the screen below. 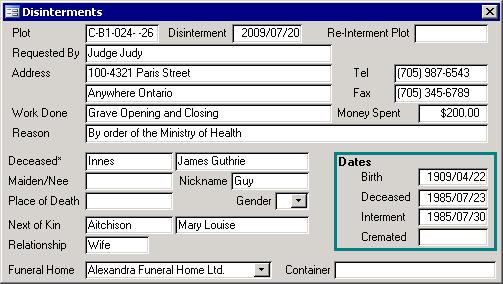
Many of the fields on the lower half of the form are the same as those on the lower
portion of the Master tab. Indeed, that data is copied here when the disinterment was first entered. Notes Tab 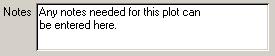 As shown in the picture on the right, the Notes tab contains a single field. While it is small in the picture here, it is actually quite a large
field. You can enter anything you need to remember about a plot into this Notes field. As shown in the picture on the right, the Notes tab contains a single field. While it is small in the picture here, it is actually quite a large
field. You can enter anything you need to remember about a plot into this Notes field.
Now that all of tabs have been explained, this page will now move onto the buttons.
The Buttons
The Plot Master form has several buttons and other controls. Most are along the bottom of the screen. The picture below shows those buttons and other controls.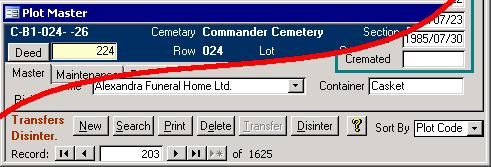
These buttons will be described below starting with the Deed button then continuing along the bottom of the form from left to right. Deed
 If the yellow field to the right of the Deed button is blank and the Rights Holder surname, given name and
the date of purchase are not blank, then clicking on the Deed button will print the
Contract for Purchase of Interment Rights, the
Indenture, and the
Certificate of Interment Rights
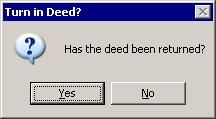
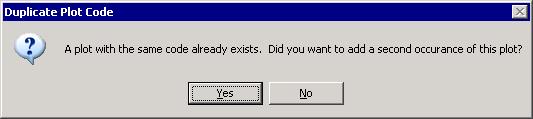
reports. Clicking it again will show the message box on the right. If you click Yes, then a new deed number will be assigned and the same three
reports will appear on the screen. This same message will appear if you use the Transfer button or the Disinter button. If you click the No button, then nothing will happen
regardless of whether it was the Deed, Transfer, or Disinter button that was clicked. If the yellow field to the right of the Deed button is blank and the Rights Holder surname, given name and
the date of purchase are not blank, then clicking on the Deed button will print the
Contract for Purchase of Interment Rights, the
Indenture, and the
Certificate of Interment Rights
reports. Clicking it again will show the message box on the right. If you click Yes, then a new deed number will be assigned and the same three
reports will appear on the screen. This same message will appear if you use the Transfer button or the Disinter button. If you click the No button, then nothing will happen
regardless of whether it was the Deed, Transfer, or Disinter button that was clicked.
Red Flags 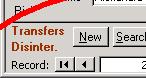 On the bottom left of the form, there are two words in red. They
indicate that the current plot, C-B1-024- -26 in the picture, has data on the Transfers and Disinterments tabs. Since transfers and disinterments are rare, plots that have such records are flagged. On the bottom left of the form, there are two words in red. They
indicate that the current plot, C-B1-024- -26 in the picture, has data on the Transfers and Disinterments tabs. Since transfers and disinterments are rare, plots that have such records are flagged.
New 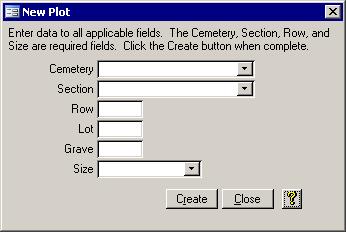 Clicking the button labelled New will pull up the form in the picture on
the right. Cemetery, Section, Row and Size are key fields that must be entered when a new plot is created. The Lot and Grave fields can be left blank if they are not used by that
cemetery's plot numbering scheme. Some extra checks were added in. If you start by choosing the Section, then the Cemetery box will automatically be filled in for you. If
you then change the Cemetery, the Section field will be cleared. This is to make sure that you cannot sections that do not belong to the chosen cemetery. The plot size is required, so it will
have the ability to appear in the re-interment list at least until the plot is in use. If you enter the a plot code that already exits, the message like the one below will appear. Clicking the button labelled New will pull up the form in the picture on
the right. Cemetery, Section, Row and Size are key fields that must be entered when a new plot is created. The Lot and Grave fields can be left blank if they are not used by that
cemetery's plot numbering scheme. Some extra checks were added in. If you start by choosing the Section, then the Cemetery box will automatically be filled in for you. If
you then change the Cemetery, the Section field will be cleared. This is to make sure that you cannot sections that do not belong to the chosen cemetery. The plot size is required, so it will
have the ability to appear in the re-interment list at least until the plot is in use. If you enter the a plot code that already exits, the message like the one below will appear.
While you can enter multiple occurrences of a single plot, it is usually not required nor is
it usually a good idea. It will be difficult to tell them apart. At minimum, the grave number should be different. While the Cemetery and Section codes are set elsewhere,
you can use up to 3 numbers and/or characters for Row and Lot and up to 2 for Grave. That should be enough to indicate multiple levels of caskets or urns for municipalities
that allow more than one person per grave by simply digging deeper. Search 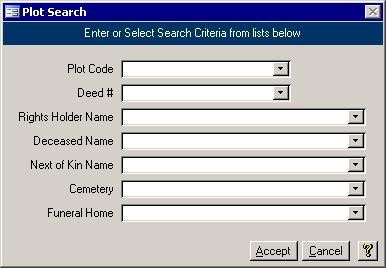 It is often required that a
specific plot needs to be located. If you only have the name of the deceased, then how do you know where to install the marker? There are other fields like Next of Kin Name by which you can find a
plot record. This can be important when the system has duplicate names in the Deceased or Rights Holder fields. When searching by one of the three name fields, start by entering the last name,
followed by a space, then enter the given name. The Funeral Home is usually a company name, so it does not follow the same principle. Once
you pick an item from the list, the Accept button will be clicked for you by the computer. If you click the Cancel button without clearing what you have typed in, then
the record matching the data you entered will be pulled up. It is often required that a
specific plot needs to be located. If you only have the name of the deceased, then how do you know where to install the marker? There are other fields like Next of Kin Name by which you can find a
plot record. This can be important when the system has duplicate names in the Deceased or Rights Holder fields. When searching by one of the three name fields, start by entering the last name,
followed by a space, then enter the given name. The Funeral Home is usually a company name, so it does not follow the same principle. Once
you pick an item from the list, the Accept button will be clicked for you by the computer. If you click the Cancel button without clearing what you have typed in, then
the record matching the data you entered will be pulled up.
Print Clicking the Print button will pull up the
Plot Details report. Delete 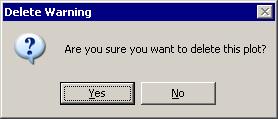 Clicking the Delete button will first show you the screen on the left. If you click the Yes button on that message box, then the
computer undo any changes then will delete the current record. There is no other check. The only way to restore the record is to reenter it manually, or to restore the cemetery
database from the backup. You can click the No button instead. Clicking the No button will not cause any changes to occur to the data. Clicking the Delete button will first show you the screen on the left. If you click the Yes button on that message box, then the
computer undo any changes then will delete the current record. There is no other check. The only way to restore the record is to reenter it manually, or to restore the cemetery
database from the backup. You can click the No button instead. Clicking the No button will not cause any changes to occur to the data.
Transfer
The Transfer button will be enabled for any plot that does the following fields still blank: Deceased surname and given name, Date of Interment, Date of Cremation, Gender,
Nickname, Place of Death, and Date of Demise. If any of these fields have data, then the Transfer button will be greyed out and the Disinter button will be enabled. Likewise,
if they are all blank, then the Transfers button will be enabled while the Disinter button will be greyed out. Now that that has been established, let's click the Transfers button. If the deed number
is not blank, then the program will first check if the deed has been returned. If so, or if the deed field is empty, then it bring up the screen below: 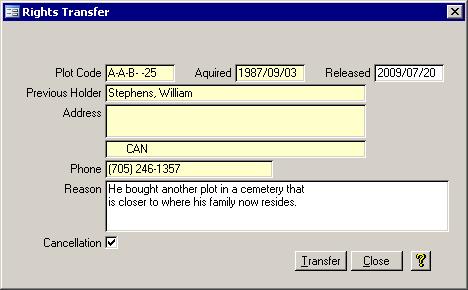
Start by verifying the date the deed was released; it defaults to today's date. Next
enter the reason for the transfer. Finish by indicating whether or not this is a cancellation. Once those three fields have been filled in, the previous Rights Holder's
data will be moved to the Transfers table. Disinter To disinter is to dig up a grave or remove from a tomb. Similar to the Rights Transfers
screen above, clicking the Disinter button, when it is enabled, will check for a deed then show you this form: 
Unlike the Rights transfer screen, this screen has several fields to be filled in.
- Disinterred:
Once again, start by verifying the Disinterred date which defaults to the current date.
- Re-Interred:
Next, you can select where the deceased will be re-interred. Only unsold plots that have size data will appear in the Re-Interred list. You can use
the New button to pull up the New Plot screen
if you need to add another plot to the system.
Requester and contact information: While this field should hold the name and perhaps title of the person who requested the disinterment, the address and
phone number fields should contain the requester's contact information.
Work Done: What work was required to fulfill the disinterment order? A description of that work goes into this box.
Cost: The work that was done has a charge associated with it. Enter the dollar amount of that charge into the box beside Cost.
Reason: Every disinterment must have a valid reason. According to Ontario's Cemetery Act, no person shall disinter any human remains without, the prior
consent of the interment rights holder and, unless cremated, notifying the proper medical officer of health. Consent not required if the disinterment was ordered by
a court of competent jurisdiction, a coroner appointed under the Coroners Act, the Attorney General or Solicitor General for Ontario, or the Registrar. As well, the
consent of the Registrar may be substituted for that of the interment rights holder if the whereabouts of an interment rights holder are not known, the interment
rights holder is not readily ascertainable, or the interment rights holder is not able to consent. In other words, disinterments are not taken lightly. There must be a
good reason and that reason should be typed into the Reason box on the New Disinterment screen.
Once these fields have been filled in, click the Disinter button. If the purchaser and deceased names are the same, or if you choose to transfer the rights holder too, then it
will copy all of the original purchaser's information to the chosen re-interment plot; otherwise, the Rights Holder name will be set to the name of the deceased on the
chosen re-interment plot. If the re-interment plot is not selected, then it is because the remains are leaving the cemeteries tracked by this system. Yellow Question Mark
The Plot Master has a button that has a yellow question mark on it. So do the New Plot, Plot Search, Rights Transfer, and New Disinterment screens. All of these buttons
do the same thing: They all pull up this help page. Sort By Finally we get to the Sort By pull down list. This control is used to change how the Plot
Master data are sorted. While the default is Plot Code, you can choose from one of the following: Plot Code, Purchaser, Deceased, Purchase Date, or Interment Date. |