Introduction This wizard, found in the Additional Reports menu, steps you through creation
of Notices of Arrears. Since water departments generally send out more forceful
letters as the arrears get older, you can create separate letter for First Year Arrears. If you want to send out notices to only rolls with first year arrears or only rolls that have missed the a due date in the current
year, this wizard can save you time.
 Step 1: Water Notice Selections Step 1: Water Notice Selections
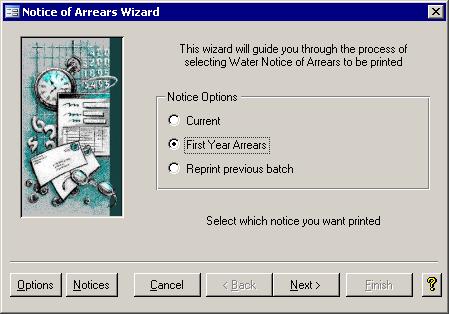
While this page breaks the wizard down into five steps, you will only hit two more
screens by clicking the Next button. For the purposes of this help file, the Options and Notices buttons access the other two steps. If you have already selected your options,
are happy with the existing letters, and have assigned letters to their proper Arrears level, then you can skip Steps Two and Three. No matter what, you will always begin here at Step One.
For this step, you simply have to select one of the Notice Options. It is important to note that if you select the First Year Arrears level, then the notices available will only
contain rolls with first year Arrears. Similarly, the Current option will make notices for rolls without Arrears. To get to Step Two, you have to click on the Options button. Step Three is accessible
via the Notices button; however, if your options and notices have already been set up, you could just select a Notice Option and click the Next button to go directly to Step 4.
 Step 2: Options Step 2: Options
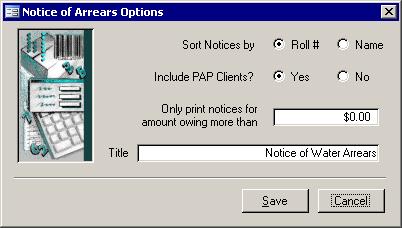
There are 4 options from which to choose. The first will determine how you want the list
boxes sorted in the Step 3. The report will also print out sorted according to this option.The second option will allow you to include rolls that have signed up for your
Pre-Authorized Payment Plan. If you do not allow PAP, ignore this option. The third option is there for your convenience. If you do not want property owners
calling you or their Ward Councilor for receiving a letter reporting an outstanding amount of $0.82, then you can put a limit here. If you choose a limit of 4, a roll that is owing
exactly 4 dollars or less will not receive a letter. The final box shows the title that appears along the top of the notices. You can change it here if you wish.
Step 3: Notice Letter Editor
Clicking the Notices button from any step of the wizard will bring you to the Notice editor screen. You will be able to see all notices for both the Tax and Water systems.
This screen, as shown below gives access to the Assignment screen through the Assign button. Part A below will go through the editor while Part B will explain how to put the letters to use. A. Adding, Editing, and Deleting Letters 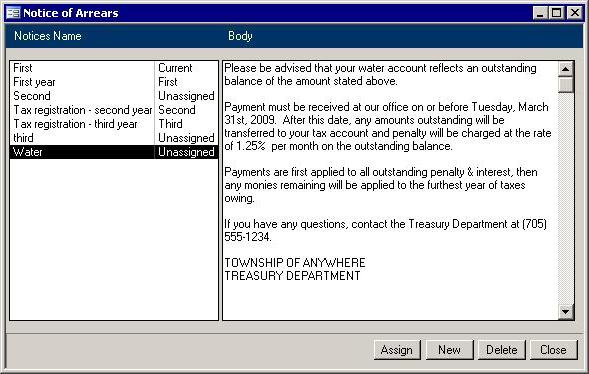
This is the letter editor. When it first opens no letters are selected in the left pane, so
the first letter is showing and is the currently selected letter. You can add in as many different letters as you wish. To edit an existing letter, choose that letter by clicking on
its name in the left pane then edit the body of that letter in the right pane. You can add a new letter by clicking the New button then typing in a name for the new letter.
The Delete button will delete the letter currently selected in the left pane. Both Water and Tax notices are in the list, so you can quickly reference other notices to check their
wording. As well, because notices for both systems appear, make sure you don't delete someone else's notice. Clicking the Assign button will open the window discussed in Section B for the currently selected letter.
B. Assigning Letter Arrears Level 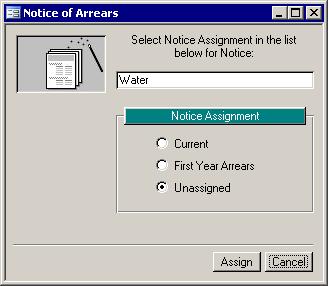 Clicking the Assign button from the Notice editor will bring up the screen on the right. The currently selected notice shows on this screen in the
white box near the top.
Clicking the Assign button from the Notice editor will bring up the screen on the right. The currently selected notice shows on this screen in the
white box near the top. Once on this screen, just choose the desired arrears level for which you want to send Notices of Arrears with this currently selected letter. You can
also stop it from being put onto any Notice of Arrears by choosing Unassigned. You can only assign one letter to each Notice Assignment level. To set the Notice Assignment for
another notice, you will have to go back to the Notice editor, select another letter from the list on the left, and click the Assign button again.
Once all required letters have been entered and assigned, you can use the Close button on the Notice Letter Editor and proceed to Step 4.
Step 4: Selecting Rolls 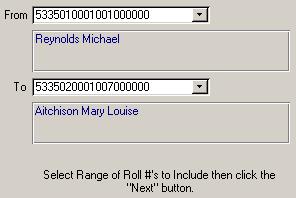 This screen allows you to choose a range of roll numbers that you want to receive a notice. You will get to refine your choices in the next step, but this is a quick way to
cut down on the number of rolls that appear if you want to process them by municipality, division, or subdivision. By default the first and the last rolls in your roll
book have been selected. All rolls within the range you chose that also match the chosen arrears level will show up on the next screen. This screen allows you to choose a range of roll numbers that you want to receive a notice. You will get to refine your choices in the next step, but this is a quick way to
cut down on the number of rolls that appear if you want to process them by municipality, division, or subdivision. By default the first and the last rolls in your roll
book have been selected. All rolls within the range you chose that also match the chosen arrears level will show up on the next screen.
 Step 5: Print the Notices of Arrears Step 5: Print the Notices of Arrears
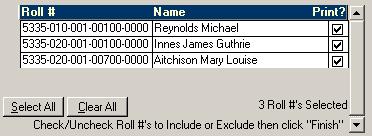 This screen allows you to fine tune your selection of
properties. All rolls that are overdue according to your Notice Option selection in step one, and that are within the range of rolls that you selected in the previous screen, step 4,
will appear in the list. If there are some rolls that you do not wish to receive a letter, make sure to remove the check mark in the box beside their name. If the check mark is removed, a letter will not be
printed for that account. When you are done choosing which to print, click the Finish button to view the report on the screen. This screen allows you to fine tune your selection of
properties. All rolls that are overdue according to your Notice Option selection in step one, and that are within the range of rolls that you selected in the previous screen, step 4,
will appear in the list. If there are some rolls that you do not wish to receive a letter, make sure to remove the check mark in the box beside their name. If the check mark is removed, a letter will not be
printed for that account. When you are done choosing which to print, click the Finish button to view the report on the screen.
|