Introduction This wizard takes you through setting up the system information. It is
automatically run when you first launch Baker and Associates software for the first time. If you do not complete the wizard, it will continue to run when you first enter the system. Once it has been
finished, it can be run at any time by the administrator. It is accessible through the Administration menu.
 Step 1: Checklist Step 1: Checklist
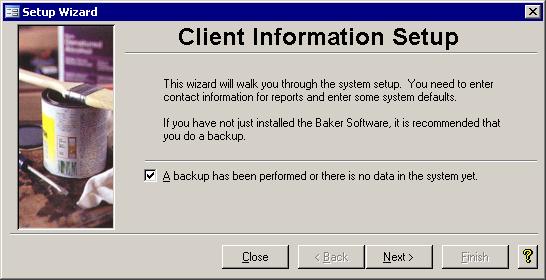
Before you can begin you have to back up the system to save the previous
configuration. If you are running this Baker and Associates software for the first time, you can just check off the box by clicking in it with the mouse. Click Next to continue on.
 Step 2: System Defaults Step 2: System Defaults
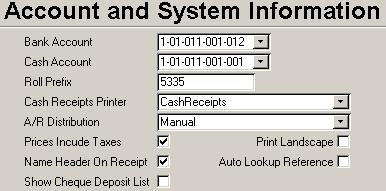 There are several fields on this screen, as shown on the right, that are used in various parts
of the Cash Receipts program. Some affect how the system works, others depend on your business rules, while still others are here to just make your life easier. Each box or check box are described below. There are several fields on this screen, as shown on the right, that are used in various parts
of the Cash Receipts program. Some affect how the system works, others depend on your business rules, while still others are here to just make your life easier. Each box or check box are described below.
- Accounts:
At certain times, the data in the account fields are used by the system. You must supply the General Ledger account numbers for the bank and for cash.
- Roll Prefix:
Contains the first few numbers of your rolls. For example, if all of your rolls start with 5335 then you could key that into the Roll Prefix field. This
will save you some typing especially when you are using the search form. (Hint: When you enter the search form, if the roll prefix is highlighted in black, press the F2 key to go to the end.)
- Cash Receipts Printer:
This shows which printer to use. Laser will use the default printer which assumes that the default printer for the computer is a laser
printer. For example, if all users of the Cash Receipts system have access to a single printer that has photocopied letterhead in it, then you can specify the name
of that printer. If any other printers are required, a special receipt can be created just for your office.
- A/R Distribution:
The way receipts are used to pay off outstanding balances in the Accounts Receivable program is determined with this pull down box. You can
select either Manual, Semiautomatic, or Automatic. One may be more work than the others but is also more flexible. Use the following descriptions to choose which option is best.
- Manual
will allow you to specify which invoices are paid off with each cash receipt entry. It also allows adjustments to be made in the form of
write-offs from within the cash receipts. If the payment amount is more than the amount distributed, then a Credit memo will be issued. This option
allows for write-offs to be entered in the Cash Receipts system. The write-offs feature is nice in case the cheque received is too low by a few
cents, you can quickly get the Cash Receipts system to add in an adjustment or two which will remove that few cents from the client's Receivable account.
- Semiautomatic
will act just like Manual with one exception. If the payment amount is more than the amount distributed, then the rest of the payment
will be distributed in order of due date with interest being paid first. Any excess amount will then be put into a credit memo. This option also allows
for write-offs to be entered in the Cash Receipts system.
- Automatic
does the distribution itself. It will calculate the order in which amounts owing will be paid similar to our Municipal Tax system. Interest will
be paid first followed by the invoices with the oldest due date. Write-offs are not available from the Cash Receipts with this option.
- Prices Include Taxes:
This determines how taxes are calculated on the General tab of the Cash Receipts Entry screen. When checked, the amount entered will be
reduced by the amount of the taxes. Otherwise, any taxes will be added to the amount entered.
- Print Landscape:
If you want the End of Day GL Register and Consolidated Summary, to print out with a landscape, rather than portrait ,orientation, put a check in this box.
- Name Header on Receipt:
Rather than photocopying letter head and using it to print receipts, your name and address as well as your logo can appear along the
top by checking off this box. That way, you will only need blank paper at the receipts printer. If your logo shows up on the menus, then you are all set to go;
otherwise, contact Baker and Associates about adding your logo to your system.
- Auto Lookup Reference:
When entering a water or tax receipt, if this box is checked and the Name field at the top is blank, then the name and address will be
filled in with the name and address for the selected roll.
- Show Cheque Deposit List:
Some people like to see and print this report. If you don't know what it is, you can enable it and check it out during the next End of
Day Wizard run. If you end up not wanting it, you don't have to send it to the printer and can disable it in the Setup Wizard once you have completed the End of Day run.
Step 3: Pre-Authorized Payment Plan 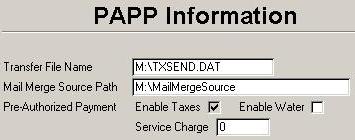 Some banks allow municipalities to offer a Pre-Authorized Payment Plan (PAPP), so the property taxes and/or water bill payments will be
removed directly from the property owner's bank account. For PAPP to work, some information is needed. The picture above shows those fields that are explained below. Some banks allow municipalities to offer a Pre-Authorized Payment Plan (PAPP), so the property taxes and/or water bill payments will be
removed directly from the property owner's bank account. For PAPP to work, some information is needed. The picture above shows those fields that are explained below.
- Transfer File Name:
The payment request file is saved with this file name.
- Mail Merge Source Path:
The Payment Preparation
and the Recalculation steps
both export data to files to be used with mail merge documents. These files will be saved in the directory indicated here.
Pre-Authorized Payment: This has two sections. The top shows either one or two check boxes. If you have not bought the Baker and Associates Water
System, then only the Enable Taxes check box will appear. The second section lets you key in a number representing the dollar amount of the service charged per roll to let them use PAPP.
Step 4: Cashiers 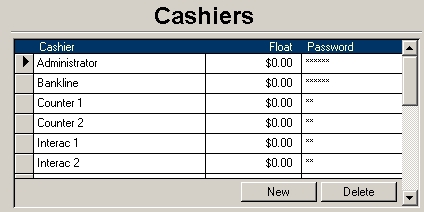
This screen allows you to enter, delete, and edit the cashiers. If there is more than one
cash computer, or if more than one computer terminal is used to accept payments, then you could set up an account for each. That way they must log into cash receipts entry
using the password specified on this screen and the end of day wizard will split the proof list up by cashier. As well, you can assign each cashier a float if you prefer, but you
must assign each cashier their own password. The passwords are not case sensitive.
 Step 5: Payment Methods Step 5: Payment Methods
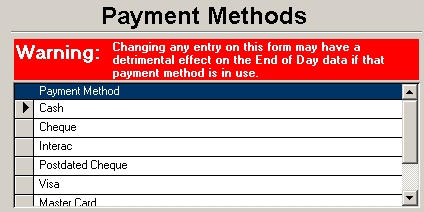
This last screen of the setup wizard allows you to add new payment methods and edit or
delete some of the existing ones. The Cash, Cheque, and Postdated Cheque values can be neither changed nor deleted. You can only edit or delete the methods that were
added by your office as long as they are not currently being used. When you are done with this screen, click the Finish button to exit the Setup Wizard. |