Introduction The Ministry of Municipal Affairs and Housing recently adopted the Municipal
Performance Measurement Program requiring municipalities to collect data, measure and report their performance to their taxpayers. This data is reported on the annual Financial Information Returns (FIR). You can
pay your auditor each year to create these reports for you, or you can set them up yourselves here once and print them as often as you like. The setup will have to be updated only when your Chart of Accounts is
changed. Setting up the FIR is an involved process and many screens are involved, but this section of help gives you a detailed walk through on how to use each feature.
The Main Screen: Start Here Clicking on Financial Information Returns in the Other Report menu
will bring up the screen below: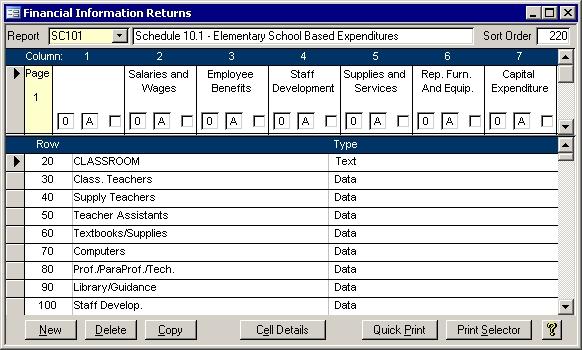
Each report is made up of columns and rows similar to a spreadsheet. There are four sections to this form: Report, Column, Row, and Buttons. For simplicity, each of the
four sections will be described in turn. As well, the Cell Details
and Print Selector buttons have their own sections below.
Report 
The report section has only three fields.
- Report:
Yellow fields cannot be edited. This is simply a search field. Use it to pull up the report of your choice.
- Description:
The middle box is where you can edit the title of the report. This will appear in the top left corner of the printed report.
- Sort Order:
This will determine the order in which the report will appear in lists and, when printed, the order in which they show on the screen. This is an optional field.
Column

- Page:
The first field is the Page number which is automatically assigned. This
does not show on any report. Some reports use only one page while others require two. To switch between pages, use the vertical scroll bar on the far right.
If you delete page 1 and add a page 3, the report will appear with page 2 first then page 3. The first page will not be blank. Really this is just an order of pages.
- Column:
There can be up to 7 columns per page. As shown in the picture above, within each column section are four fields. The top is the Column Title. If the title
is left blank then the column on the report will be blank. The three fields along the bottom are for Year, Budget, and Total
- Year:
This determines what year's data to use for this column. 0=Current, -1=Last year, -2=Two years back,...
- Budget:
A for Actual values, B for Current budget values, O for Original budget values
- Total:
Is this column a row total? If there is a check in the box, this column will show a total of all data in each row.
Row
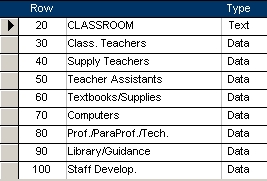 Each report has several rows. Each row has a number and a title. As well, rows can be designated to hold data, text or a total for the columns. Each report has several rows. Each row has a number and a title. As well, rows can be designated to hold data, text or a total for the columns.
- Data:
For each field, these rows will need to have a list of accounts which it uses for its calculation.
- Text:
Whatever text is entered will be displayed on the report.
- Total:
All rows up to this point will be totalled.
Buttons 
 New: New:- Delete:
Use this button to delete a report.
- Copy:
This uses the same screen on the right. The only difference is the report that is currently showing will be copied.
The new report will be exactly the same except for the Report Code, Description and Sort Order.
- Cell Details:
This is where you enter the details for each cell. See the next section for more.
- Quick Print:
The current report will be printed to the screen.
- Print Selector:
This allows you to select which reports to print from those that are available. See the
Print Selector section below.
- Yellow Question Mark:
Clicking this will bring up this section of help.
Cell Details
And now the fun part! Now might be a good time for a quick coffee break.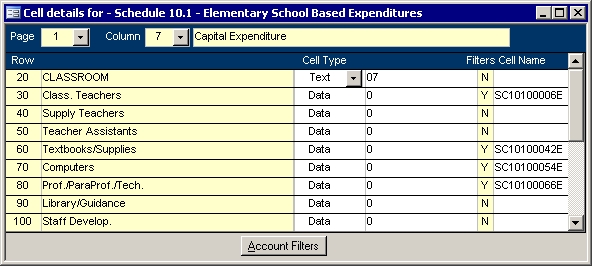
- Page:
This is a search field that lets you change between the pages of the report if it has more than one page.
- Column:
Use this to select the column on which you wish to work. The Column's title appears too.
- Row Number and Title:
For each row, the row number and title appears. These were set in the above Row section
.
Cell Type: Similar to the selections for the row
, the choices are: Data, Text, Col. Total, Row Total, and Year. The Year will show four digits for the year. If the
Column is set for year 0, then the current year will appear in the cell. The previous year will show if the column is set for year -1. Four digits for the year
that is two years back will show if the column is set for year -2 and so on.
Value: If the type is text then you can enter the exact string of text that should show in the cell. If that cell should be blank on the report, then the value column
should be blank as well. If the cell type is Data, then enter the number of decimal places to show in the cell should be put into the value field. For Totals, the Total
level should show: 1 is for subtotals, and 2 is for report totals. Really, this is just a grouping. If there is only one level, then you can put in a 1 for totals.
Filters: Filters are used to determine which accounts are used in the calculation. Filters can be entered for cells where the type is Data. A "Y" in this field indicates
that at least one filter has been set up for that cell. See the next section for more information.
Cell Name: The report layouts from the ministry have cell names for each cell that should contain data. This is an optional field.
Filters
You can get to the screen below by clicking on the Account Filters button at the bottom of the Cell Details screen. The Page, Column, and Row that appear will be the same as the one that had focus when you clicked the Account Filters button. 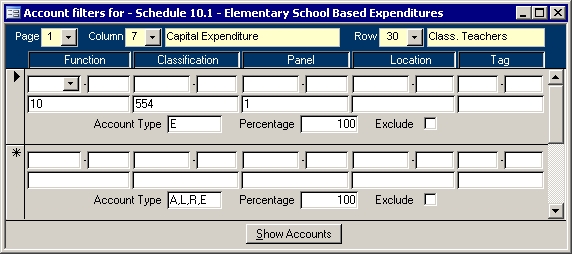
- Page/Column/Row:
These are search fields that let you know where you are and allow you to change to a different cell.
- General Ledger Account Parts:
For municipalities, Function, Classification, Panel, and Location will be replaced with Fund, Department, Sub-Department, and Activity
- Range:
You can select accounts by range by selecting the From part in the first pull down box and the To part in the second pull down box.
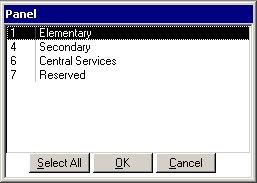 Individual Parts: You can type in exactly which values of that part you wish to
include. In the example above, all accounts that begin with 10-554-1 will be included in the cell for Page 1, Column 7, Row 30. Double clicking on this box will
bring up the list on the right allowing you to select which parts to include. Individual Parts: You can type in exactly which values of that part you wish to
include. In the example above, all accounts that begin with 10-554-1 will be included in the cell for Page 1, Column 7, Row 30. Double clicking on this box will
bring up the list on the right allowing you to select which parts to include.- Account Type:
You can choose to include accounts based on their account type. In the example above, only expenses that begin with 10-554-1 will be included. The
other types are: A=Assets, L=Liabilities, R=Revenues, E=Expenses, Z=Equity
- Percentage:
Choose the percent of the value of the transactions to include.
- Exclude:
This changes the filter from an include to and exclude. If this box were checked off, then in the above example, all expense accounts that begin with
10-554-1 would not be included in the calculation.
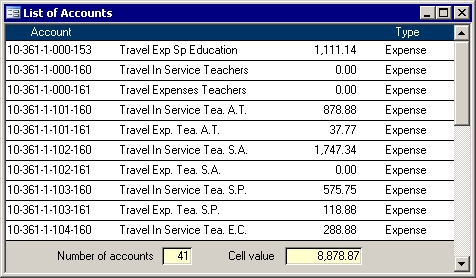
- Show Accounts:
Clicking this button will bring up a form that shows all of the accounts that match the filter. It shows how may accounts are included as well
as what the cell value will be with the current data. The picture below is an example of such a form.
Print Selector
Clicking the Print Selector on the main screen will bring up a form similar to the following: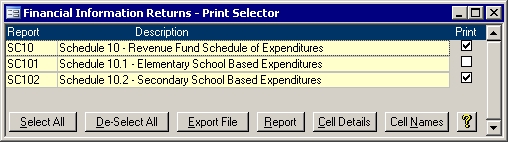
Only reports that have cell information will appear in the list. Put a check in the Print box on the far right beside those reports you wish to print. You can also use the Select
All or Deselect All buttons to speed up the process if many reports are listed. Once you have selected one or more reports, the other buttons will work as outlined below:
- Export File:
This will cause an FIR.CSV (comma separated values) file to be saved in the Baker directory on the server. Such a file can be easily imported into a spreadsheet.
- Report:
The chosen reports will be printed to the screen when this is clicked.
- Cell Details:
If you want a report showing the details of which accounts will appear in each cell for the selected reports, click the Cell Details button.
- Cell Names:
The report this creates is similar to the samples offered by the Ministry. You can use it to check if you missed any cells.
|