Introduction
Mail Merge can be used to mass-produce letters to taxpayers, vendors, users, employees or clients. To create a merge, you modify a form document and then merge it with a data source created from the database. The merge
reproduces copies of the form document. Each copy contains specific information from a record in the data source.
 For example, to write the same letter to a number of people
without typing the original letter more than once, you can create a form document (letter) and merge it with a data file or Address Book. This creates a letter for each person on your
mailing list. The text of the letter is the same on each copy, but the names and addresses are different. For example, to write the same letter to a number of people
without typing the original letter more than once, you can create a form document (letter) and merge it with a data file or Address Book. This creates a letter for each person on your
mailing list. The text of the letter is the same on each copy, but the names and addresses are different.
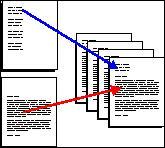
You can have the merged letters open in a third document window or go directly to your printer or e-mail. Below are a picture of what a typical mail merge main document for a form
letter looks like and a table of common commands used in merging documents. As well, there are instructions on how to create a merge document and on how to restrict the data.
|
|
|
|
August 5, 2009
<<Address>>
<<CityProvince>> <<PostalCode>>
Dear <<Name>>:
Below is the statement of the current status of your account.
|
Microsoft Word Mail Merge Tools
|
|
Tool
|
Action
|
|

|
Main document setup
|
|

|
Open Data Source
|
|

|
Mail merge recipients (filtering the data)
|
|

|
Insert a field from the data document into the master document
|
|

|
Insert a built-in Microsoft Word field
|
|

|
View merged data / field names toggle
|
|

|
When in merged data view, use these to move through the records
|
|

|
Mail Merge - choose between new document, printer, fax or e-mail
|
|

|
Check for errors
|
|

|
Merge to new document
|
|

|
Merge to printer
|
|

|
Merge to E-mail
|
|

|
Merge to Fax
|
|
Creating a Merge Document
To make a mail merge, using the above tools, start off in your word processor. While the instructions below are for Microsoft Word 2003, other word processors should have
similar tools. Once your word processor is up, follow these steps:
- Go to Tools -> Letters and Mailings -> Show Merge Tools. If you do not wish to do a letter type of merge then you will need to use the Main document setup tool to determine the document type.
- Click the Open Data Source tool, find the Access database or mail merge data file. If you select a database, then a form similar to the one below will appear.
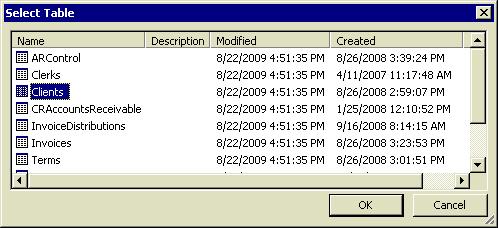
- Choose which table or query to use in the mail merge.
- Click the OK button.
Restricting the Data
If you do not want to show all records, then you can filter out the ones you want using the Mail merge recipients tool. Clicking it will show a screen similar to the one below.
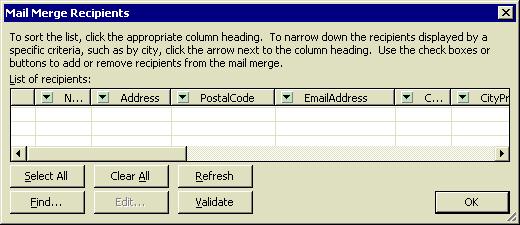
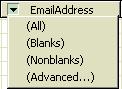 Next, click on the down arrow beside one of the column names. In
the picture on the right, the down arrow beside EmailAddress was clicked. Navigate down to Advanced and click or press the enter key. The Filter and Sort screen shown below will then appear. Next, click on the down arrow beside one of the column names. In
the picture on the right, the down arrow beside EmailAddress was clicked. Navigate down to Advanced and click or press the enter key. The Filter and Sort screen shown below will then appear.
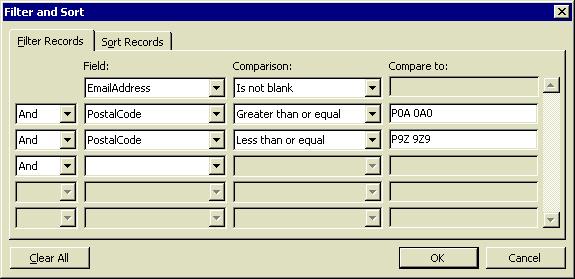
It takes time to get used to the Filter and Sort form. The picture below shows one way of restricting the mailout to only those that have area codes that
begin with the letter P. It also stipulates that the EmailAddress field must contain data.
|
